Reclaimed wood cabinets are not only stylish but also environmentally friendly, offering a rustic charm that can enhance any space. Building your own reclaimed wood cabinet is a rewarding project that allows you to create a unique piece of furniture with a story. Whether you’re a seasoned woodworker or a DIY enthusiast, this guide will walk you through the process of making your own reclaimed wood cabinet.
Why Choose Reclaimed Wood?
Reclaimed wood comes from old buildings, barns, or pallets and has a character that new wood can’t replicate. By using reclaimed wood, you’re not only saving trees but also giving new life to materials that might otherwise be discarded. The rich history and patina of reclaimed wood add warmth and authenticity to any piece of furniture.
Materials and Tools You’ll Need
- Reclaimed Wood: Choose wood that is sturdy and free of rot. Old barns, pallets, or construction sites are great sources.
- Measuring Tape: For precise measurements.
- Saw: A circular saw or table saw will work best for cutting the wood.
- Sander or Sandpaper: To smooth out rough edges.
- Wood Glue: For joining pieces together.
- Screws and Nails: To secure the wood.
- Drill: For creating pilot holes and securing screws.
- Clamps: To hold pieces together while the glue dries.
- Hinges and Handles: For the cabinet doors.
- Finishing Supplies: Wood stain, paint, or sealant, depending on the look you want.
- Protective Gear: Gloves, safety goggles, and a dust mask.
Step-by-Step Instructions
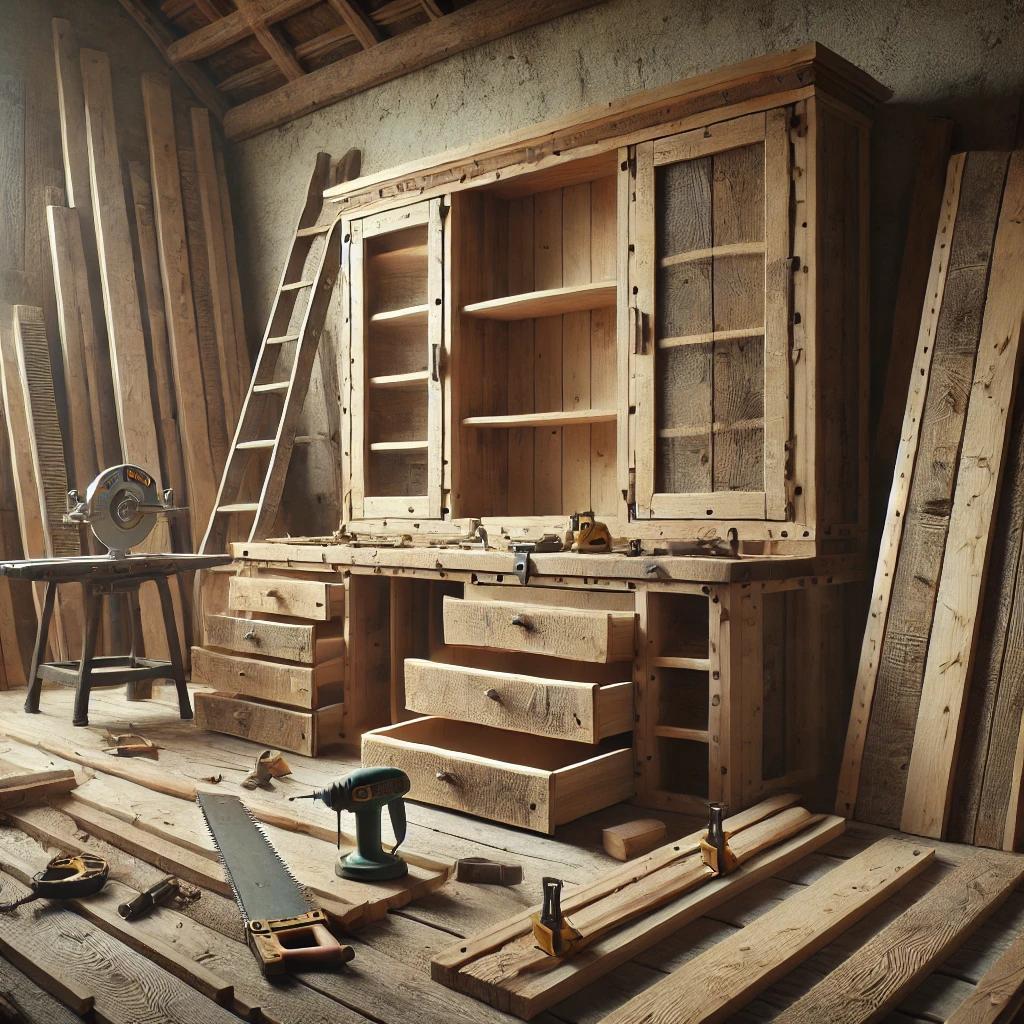
- Design Your Cabinet
- Plan the Layout: Sketch your design on paper. Decide on the dimensions and the number of shelves, doors, or drawers you want.
- Measure Your Space: Ensure the cabinet will fit where you intend to place it.
- Prepare the Reclaimed Wood
- Select the Best Pieces: Look for wood that is structurally sound and has a pleasing grain or texture.
- Clean the Wood: Remove any nails, screws, or other hardware from the wood. Clean off dirt and debris with a brush.
- Sand the Wood: Use a sander or sandpaper to smooth out rough surfaces, but be careful not to remove too much of the wood’s character.
- Cut the Wood to Size
- Measure and Mark: Measure each piece of wood according to your design and mark where you need to cut.
- Cut the Pieces: Use a saw to cut the wood to the desired lengths. Double-check your measurements before cutting to avoid mistakes.
- Assemble the Frame
- Create the Frame: Start by assembling the frame of the cabinet. Use wood glue and clamps to hold the pieces together, then secure them with screws or nails.
- Attach the Back Panel: Cut a piece of wood for the back of the cabinet and attach it to the frame using screws.
- Add Shelves and Dividers
- Measure and Cut: Measure and cut the wood for the shelves and any internal dividers.
- Install Shelves: Use wood glue and screws to secure the shelves inside the cabinet. Make sure they are level before securing.
- Build and Attach the Doors
- Cut the Door Panels: Measure and cut the wood for the doors according to your design.
- Install Hinges: Attach hinges to the doors and then secure them to the cabinet frame. Ensure the doors open and close smoothly.
- Add Handles: Attach handles or knobs to the doors for easy opening.
- Finishing Touches
- Stain or Paint: Apply a wood stain to enhance the natural beauty of the reclaimed wood or paint it to match your decor.
- Seal the Wood: Apply a sealant to protect the wood and give it a finished look. This step is especially important for cabinets that will be in humid or high-traffic areas.
- Install and Enjoy
- Place Your Cabinet: Move your new cabinet into place. If it’s a wall-mounted cabinet, ensure it’s securely anchored.
- Admire Your Work: Step back and admire the beautiful piece you’ve created. Not only have you made a functional piece of furniture, but you’ve also contributed to sustainable living by using reclaimed materials.
Tips for Success
- Take Your Time: Reclaimed wood often requires extra preparation, so don’t rush the process.
- Embrace Imperfections: The beauty of reclaimed wood lies in its imperfections, so don’t worry about small blemishes or irregularities.
- Safety First: Always wear protective gear and follow safety guidelines when working with tools.
Conclusion
Building a reclaimed wood cabinet is a fulfilling project that combines creativity with craftsmanship. By following these steps, you’ll create a one-of-a-kind piece that adds character to your home and serves as a testament to the beauty of upcycling. Whether you’re making this cabinet for your kitchen, living room, or bathroom, it’s sure to be a conversation starter and a cherished addition to your home. So gather your tools, find some beautiful reclaimed wood, and start building your own unique cabinet today!
Nick Smith looks at the bigger picture to reveal how the world economy has changed in his lifetime, asks why rich people suddenly stopped buying antiques after a couple of centuries (only half in jest), and examines questions such as: did Star Wars single-handedly destroy post-war collectables? The book does two things: (1) it provides a history and past patterns to the market, which we can use as context when navigating our own way through the markets today; but also (2), where its this all leading towards tomorrow?
Published by Nick Smith
Church Farm, Main Road,
Etton, Peterborough, PE67DA.
Tel 01780 435060